
Windows 11 Volume Level Changes Automatically. When using Windows, it’s not very nice when the volume keeps going up and down. Anyone can experience this general issue due to software or hardware-related reasons. When an audio problem occurs with the internal speakers or an external audio device, this issue is encountered.
Troubleshooting an issue is simple once you know the reason for it. This article will show you how to fix a problem in Windows 11 where the volume level goes up or down by itself.
Fix Volume Level Automatically Goes Up or Down in Windows 11
Are you having audio problems on your Windows 11 computer? Here are the steps you have to take to fix it:
1. Disconnect Audio Devices
First, disconnect any audio tools from your PC. If the issue is with the hardware or the software, this will show you. You can move on to the next part of this article if the issue is still encountered, which is probably a software issue.
The reason for this is that you aren’t currently facing the issue. Find out what’s causing the issue to be fixed.
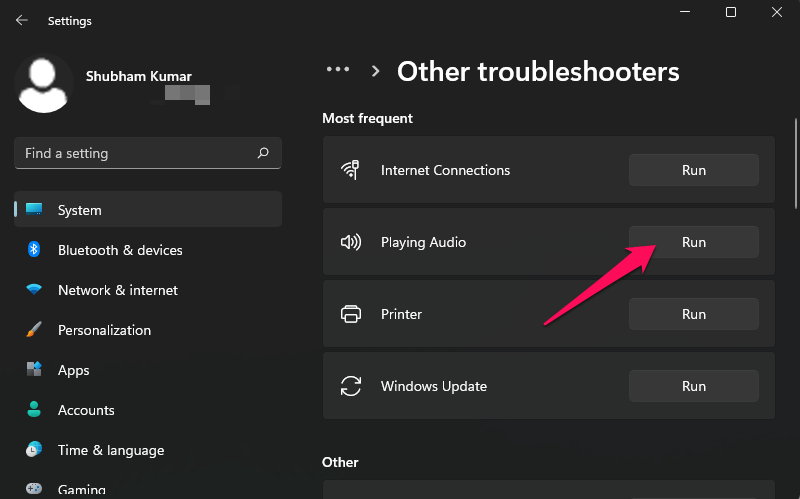
2. Run Audio Troubleshooter
Using an Audio Troubleshooter, you can diagnose the issue you are facing. Follow the steps below to make this happen: Click the Start button, then click Settings to open it.
- Now, click on Troubleshoot, and then click on Other Troubleshooters.
- Connect the Run button next to Playing Audio, and then follow the on-screen
- directions to run the troubleshooter. Run beside Playing Audio
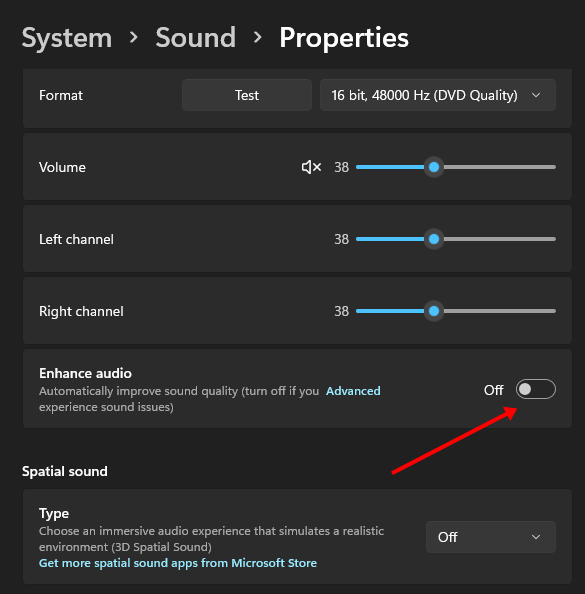
3. Turn Off Audio Enhancements
The Audio Enhancements feature makes your PC sound better. But this feature might sometimes cause this issue. Turn off this feature to fix the issue.
- To open Settings, press Windows + I on the computer. Settings for Windows 11

- On the right, click the Sound choice.

- Under “Output,” click on the audio device you want to use.
- To turn this feature off, set Enhance Audio to Off. Improve audio
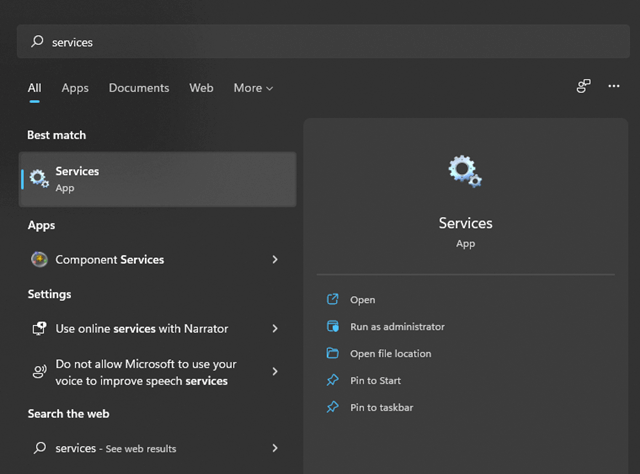
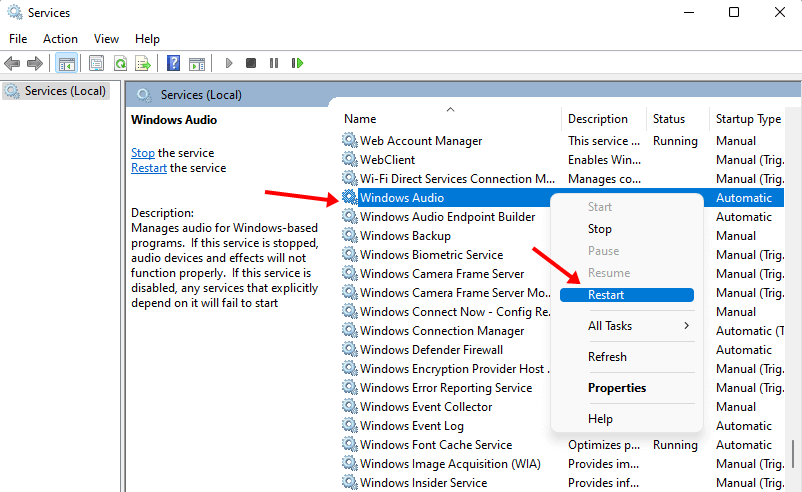
4. Restart Audio Services
The volume level in Windows 11 may go up or down on its own if there is an issue with the audio services on your PC. Follow the steps below to restart the audio services in order to fix the problem:
- Extend the Start menu, search for “Services,” and then open it. Search for help
- Find Windows Audio, right-click on it, and click the “Restart” button.
5. Turn on Exclusive Mode
To see if it fixes the issue, turn on the exclusive mode in the sound settings. To do this, follow the steps below:
- On Windows 11, click the Settings button, then click the Sound option.
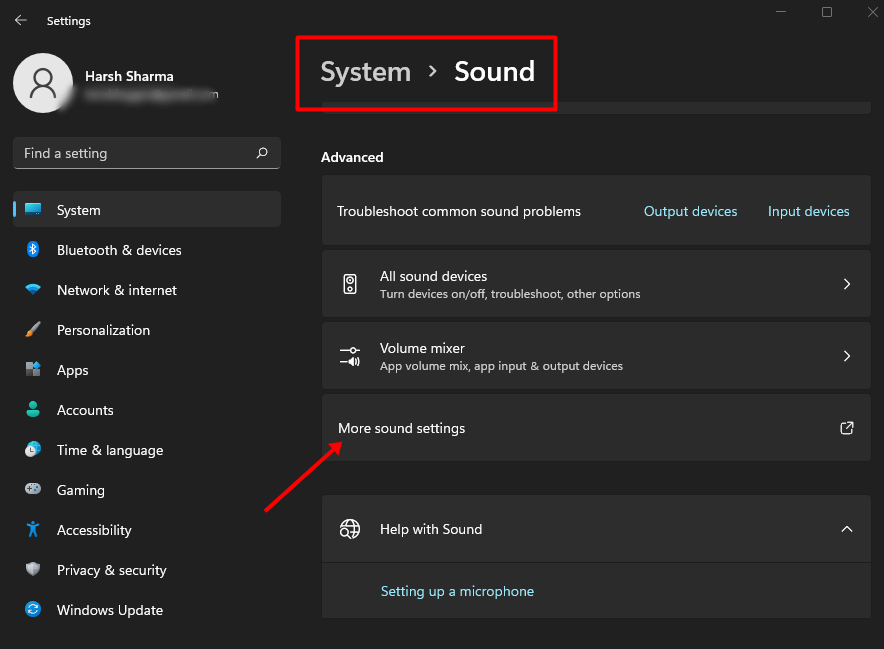
- Scroll to the bottom of the page and then click on More Sound Settings. More Places to Make Noise
- Now, double-click on the device you are using to play audio.
- Go to the Advanced tab and then check both boxes under Exclusive Mode. Exclusive Mode

- Connect Apply, then OK, to save the changes.
6. Update Audio Drivers
Outdated audio drivers can also cause a sound driver issue. Make sure your audio driver is up to date to fix the issue. You can do this by following these steps:
- Right-click on the Start button and then click on Device Manager.
- Double-click on the sound, video, and game controls to make them bigger.
- Right-click on your audio driver, then click on Update Driver. Click on Driver Update

4. Now, click on Search instantly for drivers to install the latest drivers.
7. Reinstall Audio Drivers
This issue may also be caused by damaged or faulty driver files. Reinstalling the driver is the only way to fix the issue. Here are the steps to follow:
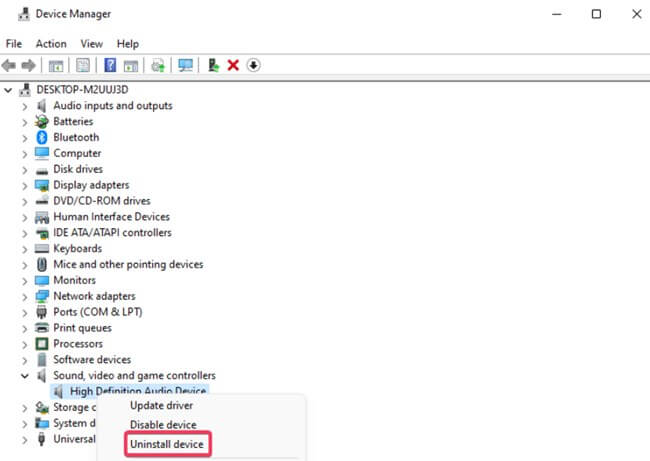
- Press the Windows and X keys simultaneously, then click on Device Manager.
- Double-click on Sound, video, and game controllers to widen the list.
- Right-click the audio driver on your PC and click “Uninstall Device.”
4. To reinstall the driver on your PC, you need to restart it.
Final Words
If the Volume level instantly changes in Windows 11, the steps above should fix the issue. If the issue still exists, close all of the background-running apps.
Because third-party apps could mess with the sound and cause this issue, but if the external audio device you use is broken, you should fix it or get a new one.


