


Fixing a Random Windows 11 PC Sleeping? You can put your computer to Sleep to save Power when you’re not using your computer. When you put your PC to sleep, all its apps and services will also go to Sleep. When you return to your computer, you can pick up where you left off. This will save the battery on your PC and keep you from having to turn it on and start all the apps over again.
Many people using Windows 11 have said that their computers sleep independently. If your computer goes to Sleep while working on something important, this can be not very pleasant. This issue can be caused by several things, such as a power plan incorrectly set up, waiting for updates, an old graphics driver, etc.
These problems are common in Windows 11, and the reasons for fixing them are also common. Here are some steps to help you figure out what’s wrong and fix it.
Fix Windows 11 PC Going to Sleep Randomly
Are you upset that your computer automatically goes to sleep mode? What you can do to fix this issue will be discussed.
1. Change Power Plan
If you’ve been having this issue, it’s probably due to a bad power plan. To fix this issue, you can change your power plan to add more sleep time. To do this, follow the steps below:
- If you simultaneously press the Windows + I keys, the Settings app will open.
- Click on System, then click on Power & Battery.


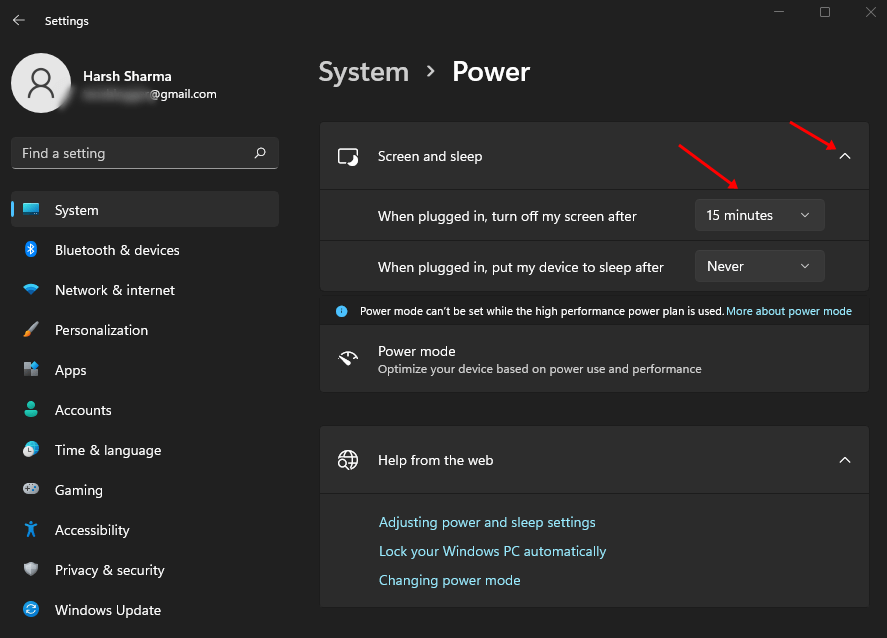
3. Click the arrow next to the Screen and Sleep part to expand it.
4. In the drop-down choice next to “On Battery Power, put my device to sleep after,” choose either 10 minutes or 15 minutes.

2. Update Windows
Pending updates could also cause this issue. By updating your Windows, the issue should be fixed.
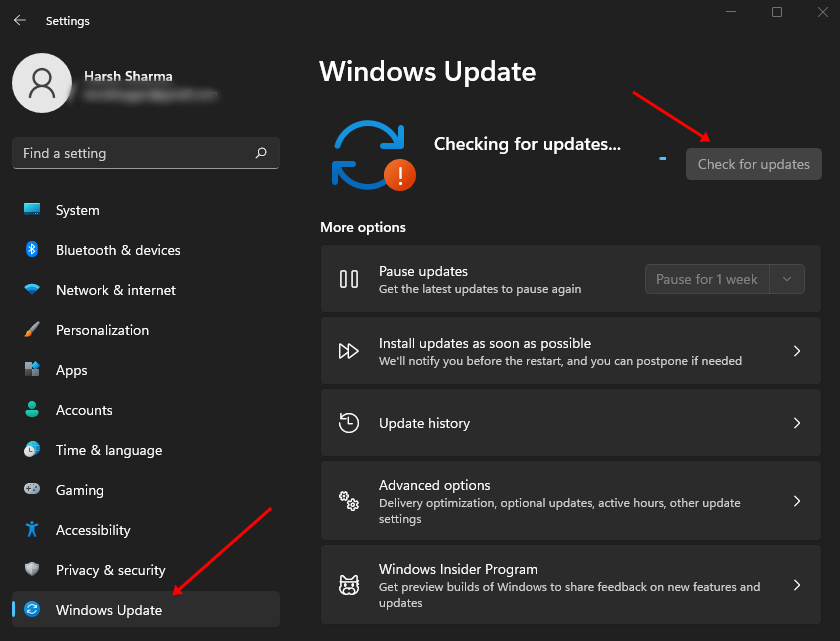
- Press the Windows key, type “Check for Updates” into the search box, and open it.
- Here, connect the Check for Updates button to search for updates. Check For Updates
- Here, you can download and install all of the available updates, and then you should restart your PC.

3. Run Power Troubleshooter
You have to do the test yourself to determine if you have a problem. Here are the steps you need to follow to use the power troubleshooter:
- Click the Settings button while holding the Windows key.
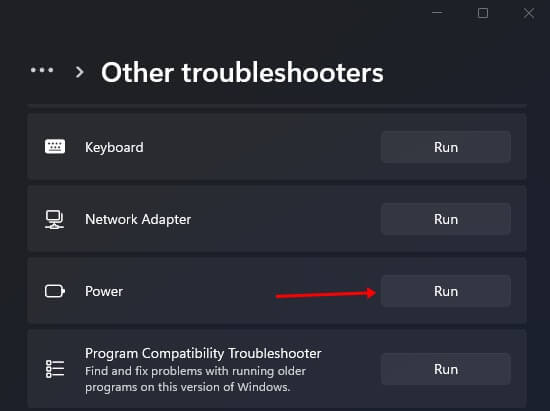
- Under System, click on Troubleshoot option, and then click on Other Troubleshooters.

- Next, click the Run button next to Power and follow the on-screen directions to run Power Troubleshooter.


4. Disable Hibernation
This issue could also be caused by your PC being set to sleep. If your Windows 11 PC suddenly goes to Sleep, you can fix it by turning off hibernation. To do this, follow the steps below:
- Press the Windows key, type “Edit Power Plan” into the search bar, and open it.
- Here, click the choice that says Change Advanced Power Settings.
- Double-click on Sleep to make it bigger, then do the same thing with Hibernate.
- Please set it to use the battery and never plug it in.
5. Update Graphics Driver
This issue can also be caused by computer drivers that need to be updated. If Windows 11 goes to Sleep out of the blue, you should be able to fix the problem by updating the graphics driver.
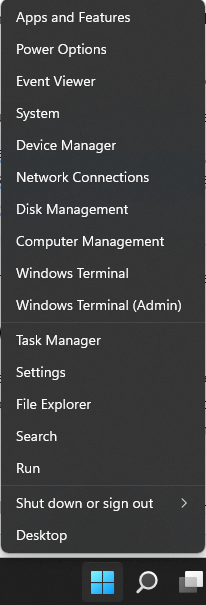
- Right-click on the Start button and then connect Device Manager.
- Expand Display Adapters by double-clicking on it.
- Right-click on your graphic driver and then click on Update Driver. Now, click on Search Automatically for Drivers to update the driver.
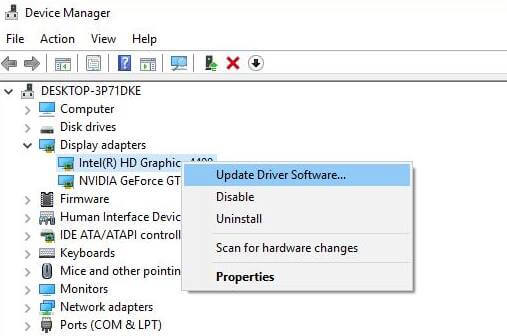


Note- If there are two drivers here, update them both.
6. Change your Screen Saver Settings
You can also change the screen saver’s settings. Follow these steps to accomplish this:
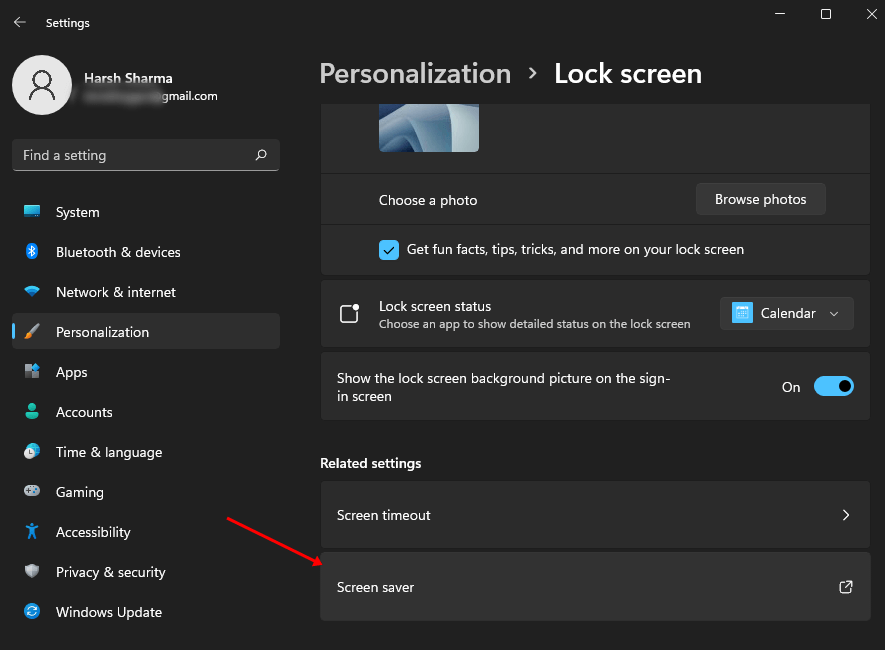
- Click on Personalize after right-clicking on your screen.
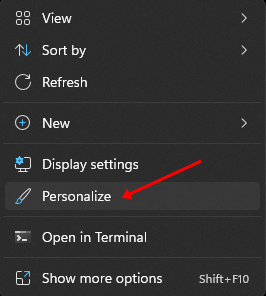
- Click Screen Lock, then click Screen Saver.
- Now, click on the drop-down menu and select None.
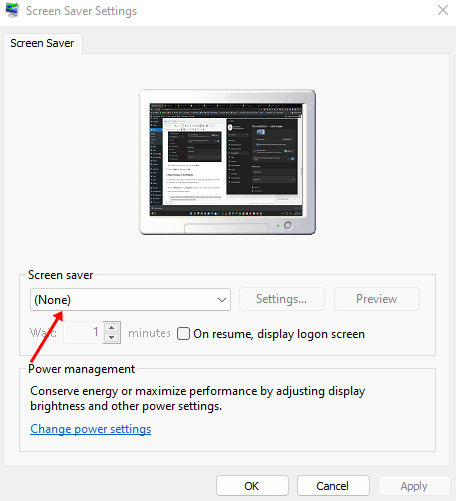
- Click on Apply and then click on OK.


7. Make Changes to the Registry
Try this method if you have this issue after elevating from Windows 10 to Windows 11. Here are the steps to follow:
- Press the Windows key, type Regedit, and click on the first choice.

- Here, head to the following address-
-
Computer\HKEY_LOCAL_MACHINE\SYSTEM\CurrentControlSet\Control\Power\PowerSettings\238c9fa8-0aad-41ed-83f4-97be242c8f20\7bc4a2f9-d8fc-4469-b07b-33eb785aaca0
-
- On the right side, double-click on Attributes to edit it.
- Set the Value Data to 2 and then click on OK.
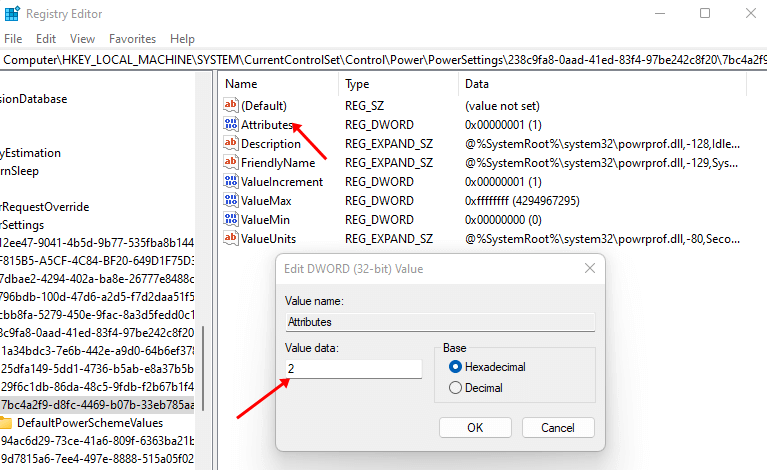
- Close the Registry Editor and restart your PC.


Final Words
If Windows 11 suddenly goes to Sleep, the steps above should help fix the problem. You can only tell if you have a problem by calling it a day.
Laptops have a magnetic sensor that can tell when the cover is closed, and the computer is in sleep mode. When a magnetic object gets close to your laptop, it may think there’s a problem and put itself to Sleep.