


Screensaver Not Working on Windows 11. When I was young, the screensaver was one of the most beautiful parts of my Windows system. I would write my name in 3D text to see how it looked. But screensavers are less famous than they were because new technologies are coming out.
But a very large number of people still find screensavers useful. Even my old machine has a screensaver. But some Windows 11 users can’t use it for some reason.
If you have the same problem and want to save time, follow this super easy guide on fixing the screensaver not working on Windows 11 so you can use cool screensavers again.
How to Fix Screensaver Not Working on Windows 11
Because we’ve run into the issue, there are some answers. So, we made a list of the best ways to fix the screensaver not working on Windows 11 and gave them to you. So, let’s straighten everything out right away.
1. Check Screensaver Settings
You can see the screensaver if you shorten the time it stays on before the system goes to sleep. To check your screensaver settings, do these three very easy things. After that, check to see if the screensaver isn’t working right.
- Press the Windows key, type in “Screen saver,” and open it.
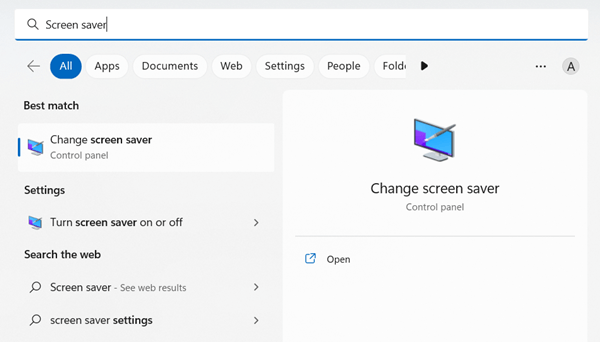
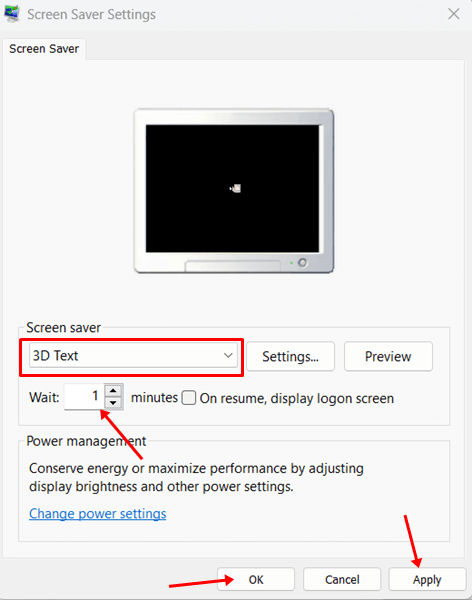
- Now select any cool screensaver be it a 3D name or bubbles instead of none.
- Here you also can change the time trigger of the screensaver. So make sure to keep it under a minute.


2. Settle Your Mouse Properly
You can bring this trouble on yourself with a small move of the Mouse. Always remember that a screensaver shows up when your system is about to stop doing anything for a while.
But this could be because your Mouse isn’t set up correctly. To avoid this issue, use a smooth, soft mouse pad instead of a rough one. Also, it’s important to pay close attention to your Mouse.
Your Mouse won’t work if you leave it on a smooth surface. So, Windows 11 can show your screensaver. 3. Stop using the Mouse to wake up
3. Disable Wake Up using Mouse
If you can’t give us the best working mouse and surface, we can help you in a very important way in another way. Well, you can stop it from waking up by changing the driver setting.
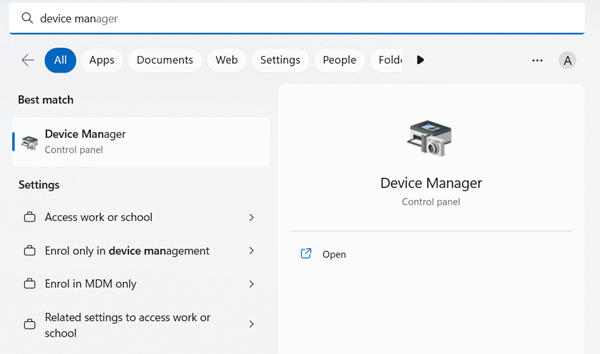
- Click “Windows,” type “Device Manager,” and then click “Open.”
- Click on the tiny arrow on Mice and other printing devices.
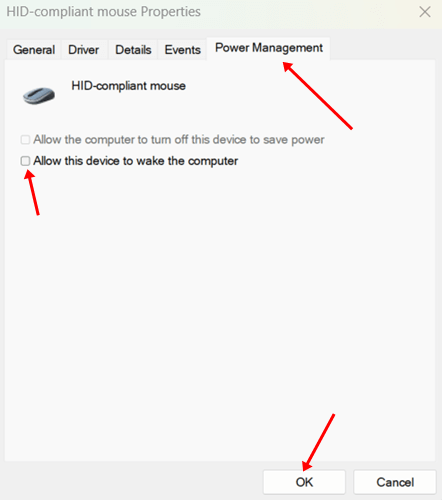
- Now right-click on the mouse driver, and select properties.
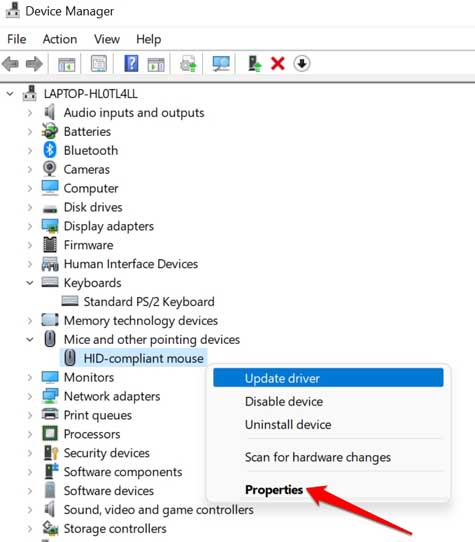
- Next, heads over to Power management, and unchecked the box Allow this device to wake the computer. Lastly, click on the Ok button.


4. Disconnect All Peripherals
You never know what peripherals are still working in the background. Since the peripherals always work, the system is always awake. To turn on your screensaver, disconnect and remove all of your peripherals.
Also, external drivers have some bad instructions in the background. The best thing to do is to take them away for a little while. After you remove them from the system, check to see if your Windows 11 screensaver is still working.
5. Check Sleep Settings
How do screensavers work if you don’t give them any time between when the system is working and when it goes to sleep? Our system sleeps when we don’t use the keyboard and Mouse for a while. Check if the screensaver is running by following these simple steps.
- Click on Windows > Settings > System.
- Then click Power & Battery.

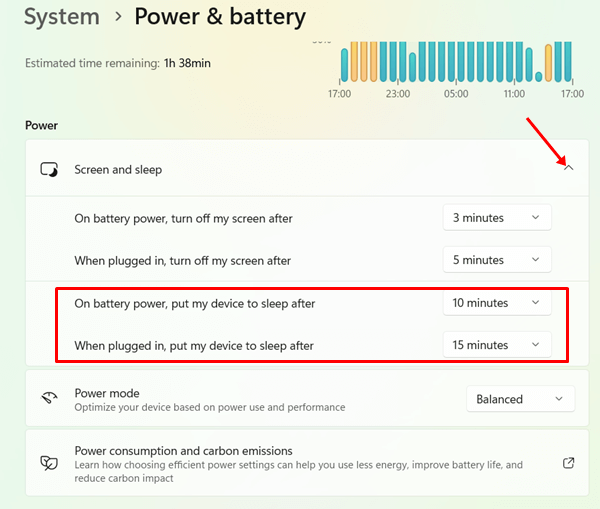
- Now expand the Screen and sleep option.
- Next, extend the time adequate for the screensaver on When Plugged In, Put My Device to Sleep After accordingly before sleep mode activates.


6. Perform SFC Scan
System File Checker, or SFC, is a helpful Windows tool. It helps you find the broken system file and change it with a working file so that the system can run easily and without problems. Here’s how to fix a broken file preventing your screensaver from working.
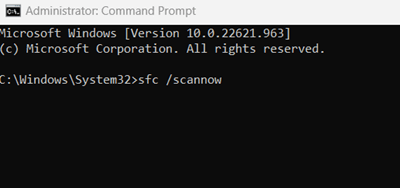
- Click Windows, look for “Command Prompt,” and then click “Run as administrator.”
- Now type the following command on CMD, and hit enter.
sfc /scannow

7. Perform Power Troubleshooter
The next step is to use your Windows system’s power repair tool. With this tool, you can fix any power or energy issue. Here are the rules you need to follow.
- Click Windows, then Settings, then System, and then Troubleshoot.
- Next, click on Other troubleshooters.
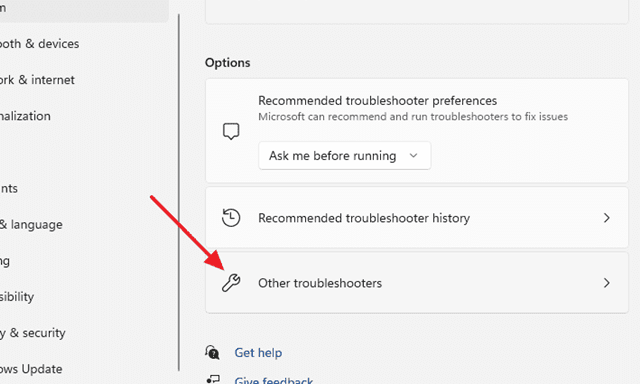
- To run the power troubleshooter, click on the Run button on Power.
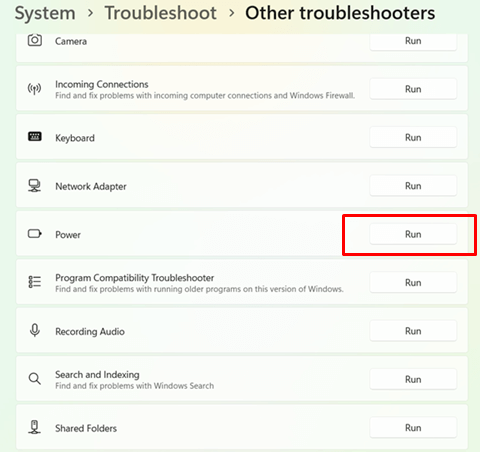
- It will detect all probable errors, and let you fix those errors as well.


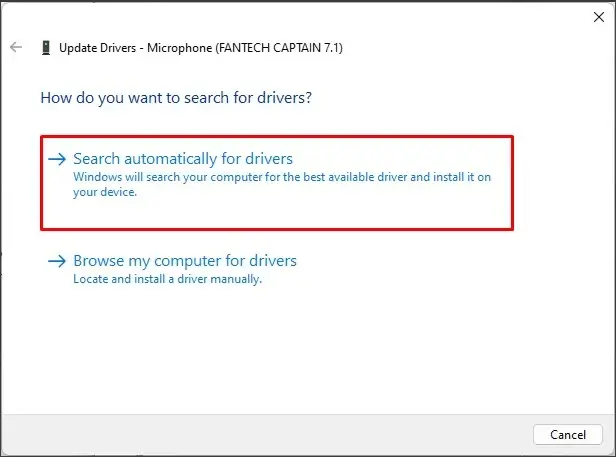
8. Update Display Driver
When Windows 11 screensavers stop working, it’s almost always because the monitor drivers are broken or outdated. The best thing to do is update the driver for the monitor.
- Press Windows, look for Device Manager and click on it to open it.
- Next, click on the tiny arrow of the Display adapter, and you will get the display driver.
- Then, right-click upon the driver, and select update.

- Now choose Search automatically for updates, it will update the display driver.


9. Update Windows
Windows is an operating system that has many problems. But the people who make it always work to make it a small and useful device. They often put out updates to fix bugs and give users the best experience possible.
If you still need the most current version of Windows, you might run into a few problems. Update your system by following these instructions.
- Windows Update can be accessed from the Windows menu.
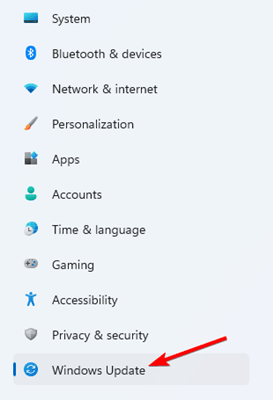
- Then, click on Check for updates to get all due updates.
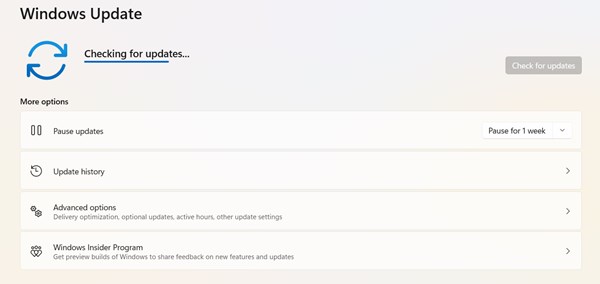
- Download all available updates one after one, and install them to make your system run more efficiently.


Final Words
First, it’s great to hear that people still use cool screensavers. And I’m fortunate to be able to give people who are having an issue some tried-and-true answers. So, this is a guide on how to fix a Windows 11 screensaver that isn’t working. Tell us in the comment box if you still need help with the system.